Connecting to ITAS Infrastructure from Outside of Classrooms
A Virtual Private Network (VPN) tunnel into the ITAS network is in place for students and faculty. This will allow for secure user access from outside of the ITAS network to ITAS resources such as the development server (dev.itas.ca) and student VMware ESXi servers.
!!! WARNING !!! |
|
While connected to the ITAS VPN, users must use technology resources in ways that uphold all federal, provincial, and local laws and regulations. |
Connecting to the VPN:
- Windows 10
- Mac OS
- Linux
- Android
- IOS
Windows 10:
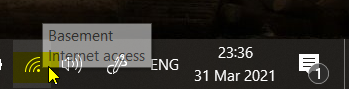
To set up a VPN connection in Windows 10, hover over your networking icon in your taskbar and Right-Click.
Select "Open Network & Internet settings"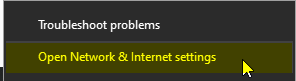
This will bring up the "Network & Internet settings" module of Windows Settings. In the left-side panel, select (click on)"VPN"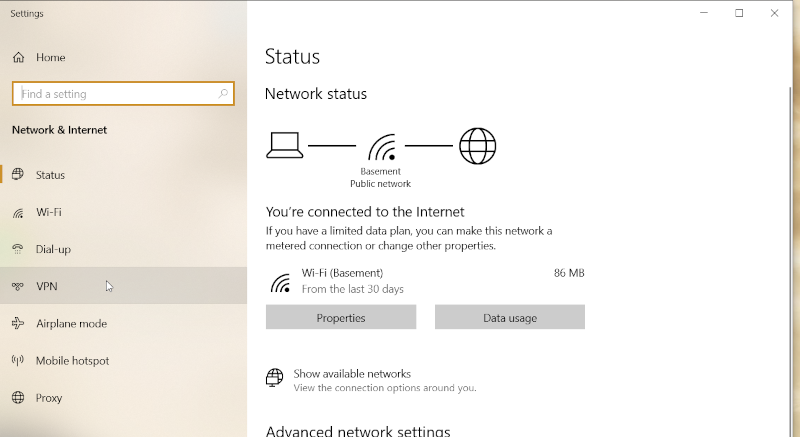
This will bring up the VPN Page. Select "Add a VPN connection"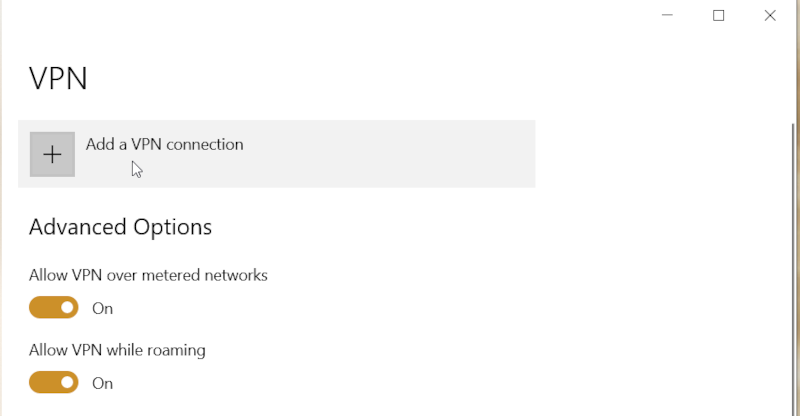
This will bring up the "Add a VPN connection" page.
Fill in the fields as below (you can call the "Connection name" anything you like). The Pre-shared key is "vpn@itas". Once you have all these fields filled, click on "Save".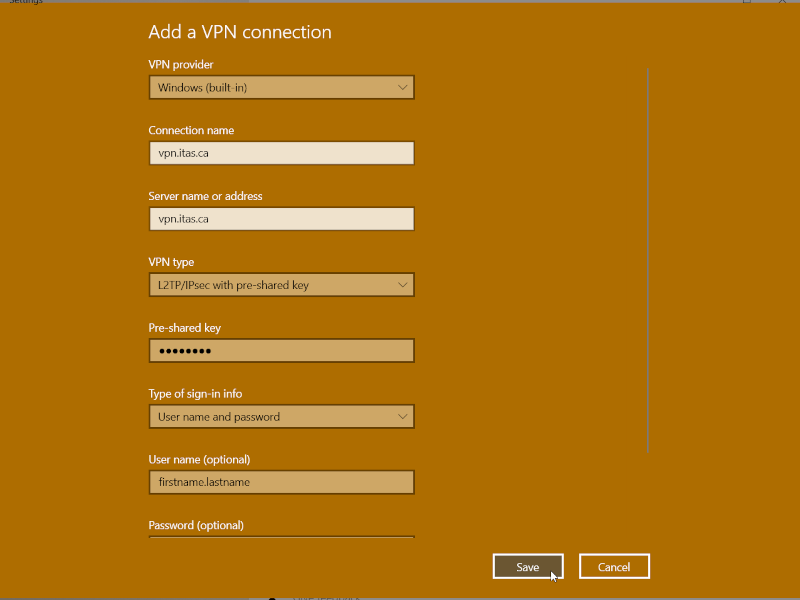
This willl bring you bach to the VPN page of the Network & Internet settings module. Click on your new VPN connection.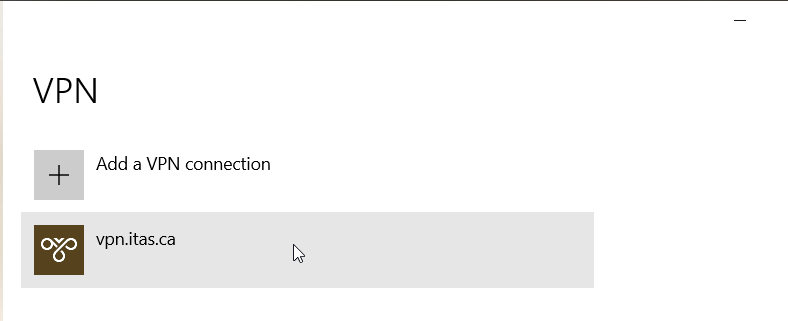
For your ITAS VPN connection, click on "Connect".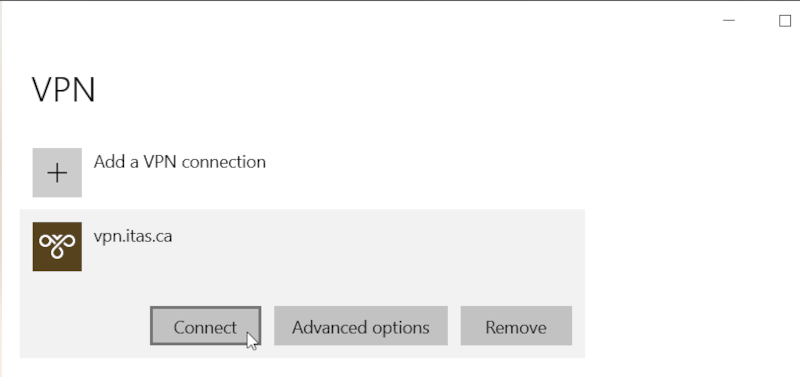
If you chose not to save your password, you will now be prompted for it.
If all goes well, your VPN will connect and you will now be inside the ITAS network on the new VPN connection.
VPN Connection DNS Settings:
Prior to connecting to the VPN, if you were to do a "nslookup dev.itas.ca" in the Command Prompt (cmd.exe), you should get the result of "104.128.240.95", which is the external facing IP address for the server named "dev.itas.ca". As you can see in my example below, the nameserver in which it looked up the address for dev.itas.ca was "MONAS.int.viu.ca" at an address of "10.200.8.97".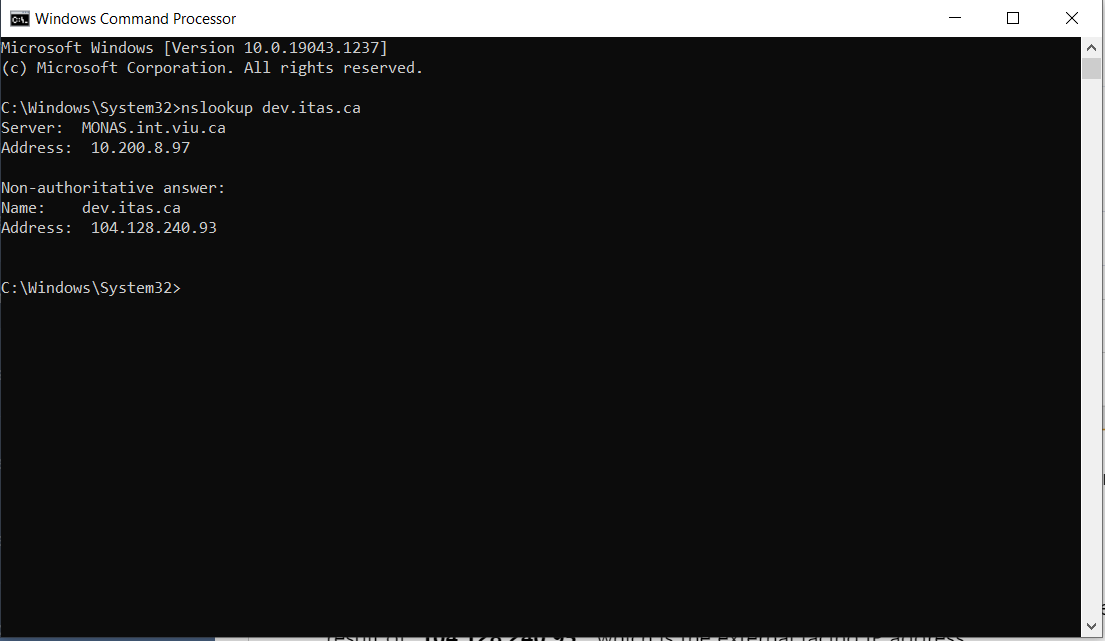
Connect to the VPN by clicking on "Connect" for the connection you just created (in my example, "vpn.itas.ca").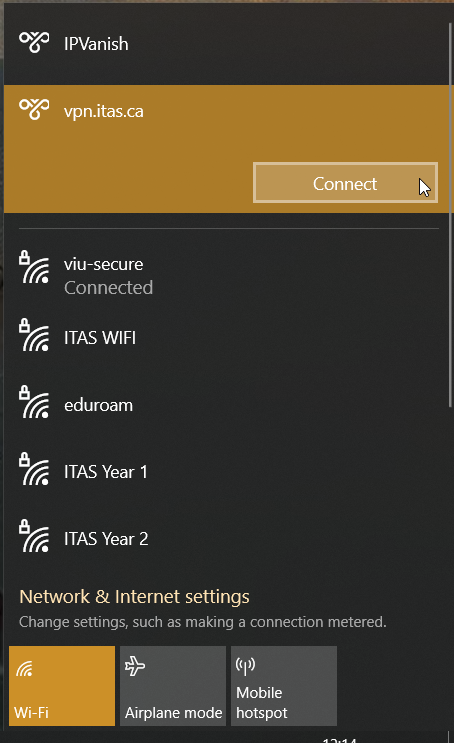
If your connection is successful, your VPN connection should show a status of "Connected":
To test the connection, you can once again do a "nslookup dev.itas.ca" in the Command Prompt window. You should now get a result of ".10.104.142.104" and the nameserver that was used for the lookup should be "dns3.itas.ca" at IP address "10.104.192.93":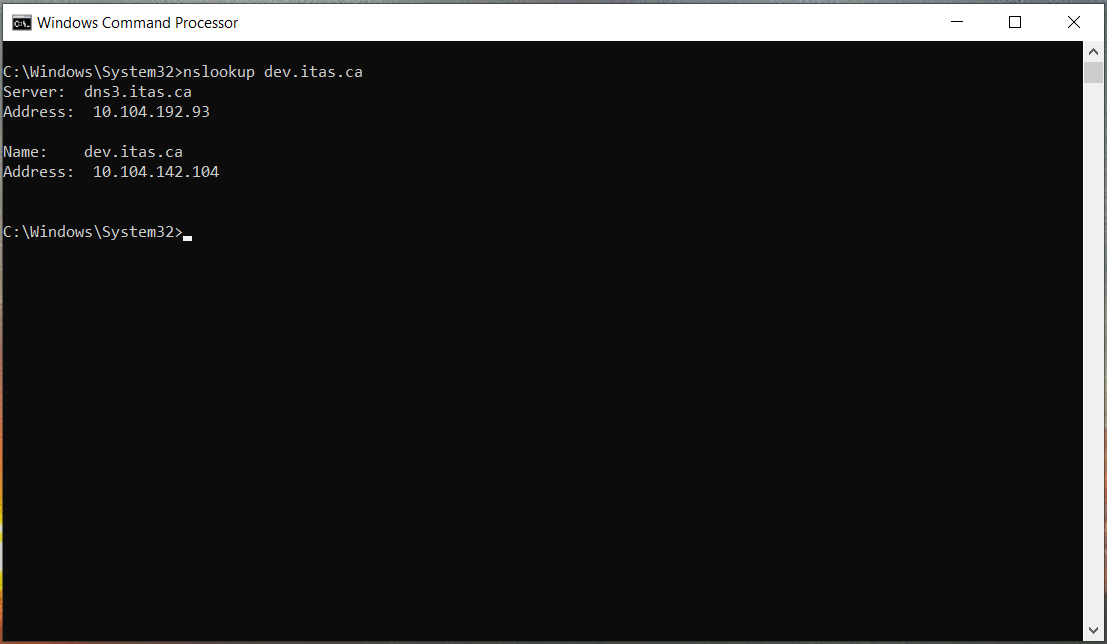
At this point, you will most likely encounter a problem if using MobaXTerm. VPN connections in Windows 10 automatically respect the nameservers from the VPN connection while you are connected. For some reason, MobaXTerm doesn't always (in fact, very rarely) follow this same process and uses the default connection's nameserver settings.
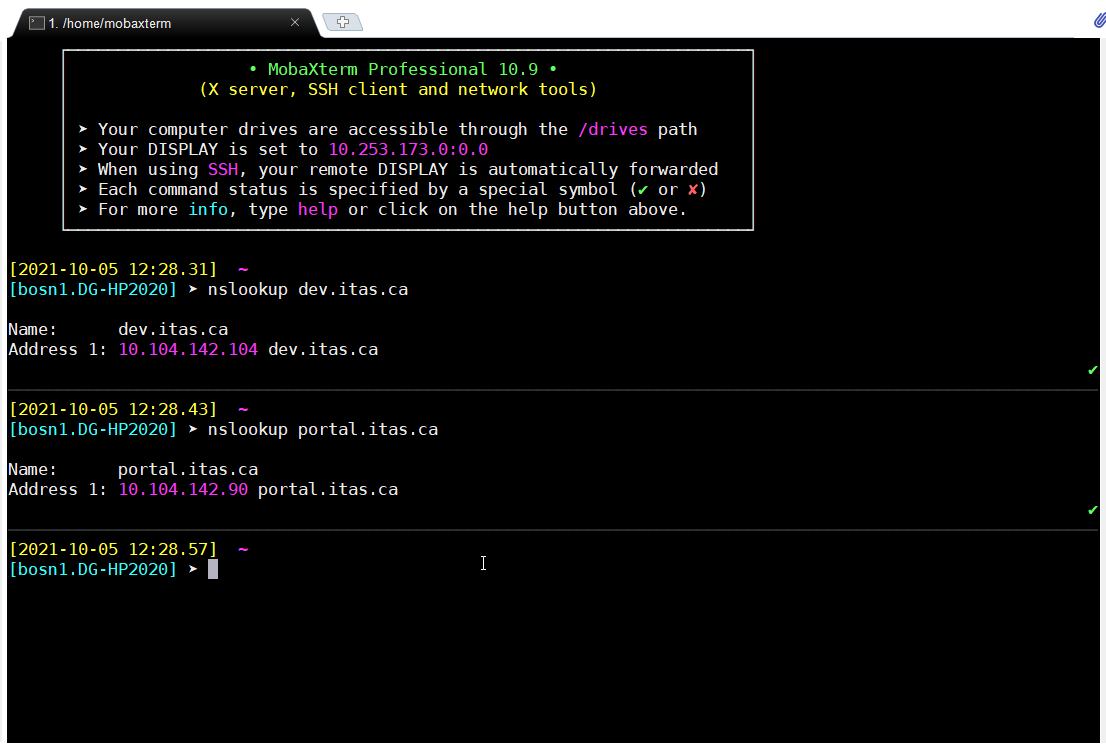
This is depicted below - while connected to the VPN, if you do a "nslookup dev.itas.ca" in MobaXTerm, it will probably show the external IP for the dev server, "104.128.240.93".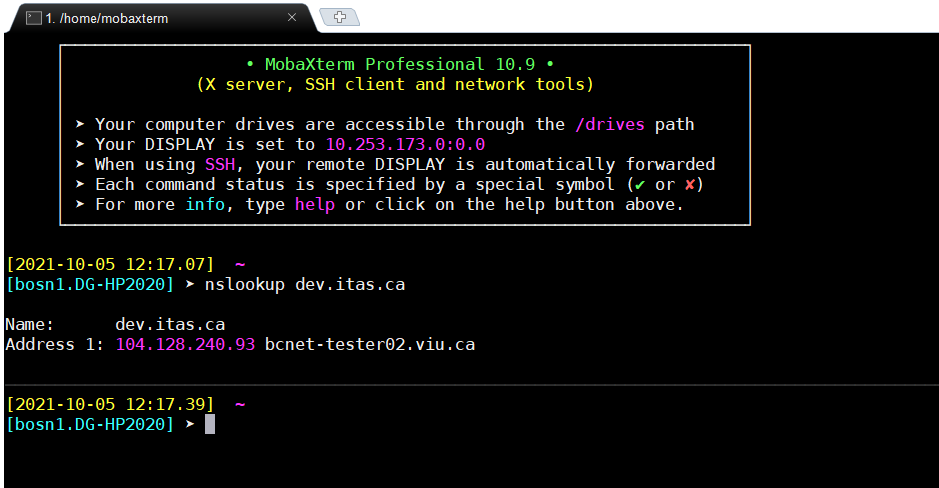
It is impossible to connect to this IP address while connected to the VPN.
This situation is easily fixed:
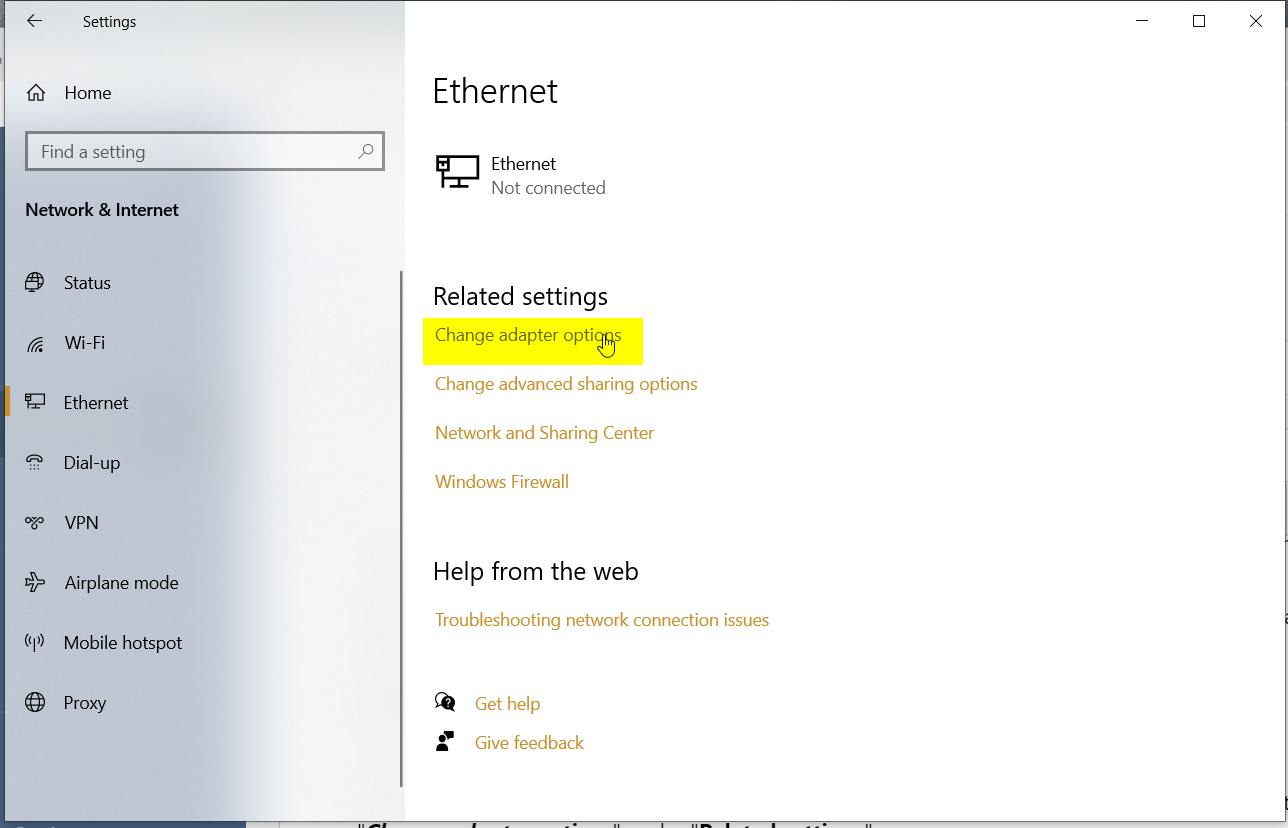
Once again, Open Windows Settings and click on "Network & Internet". Click on "Ethernet" in the left menu panel and then on "Change adapter options" under "Related settings":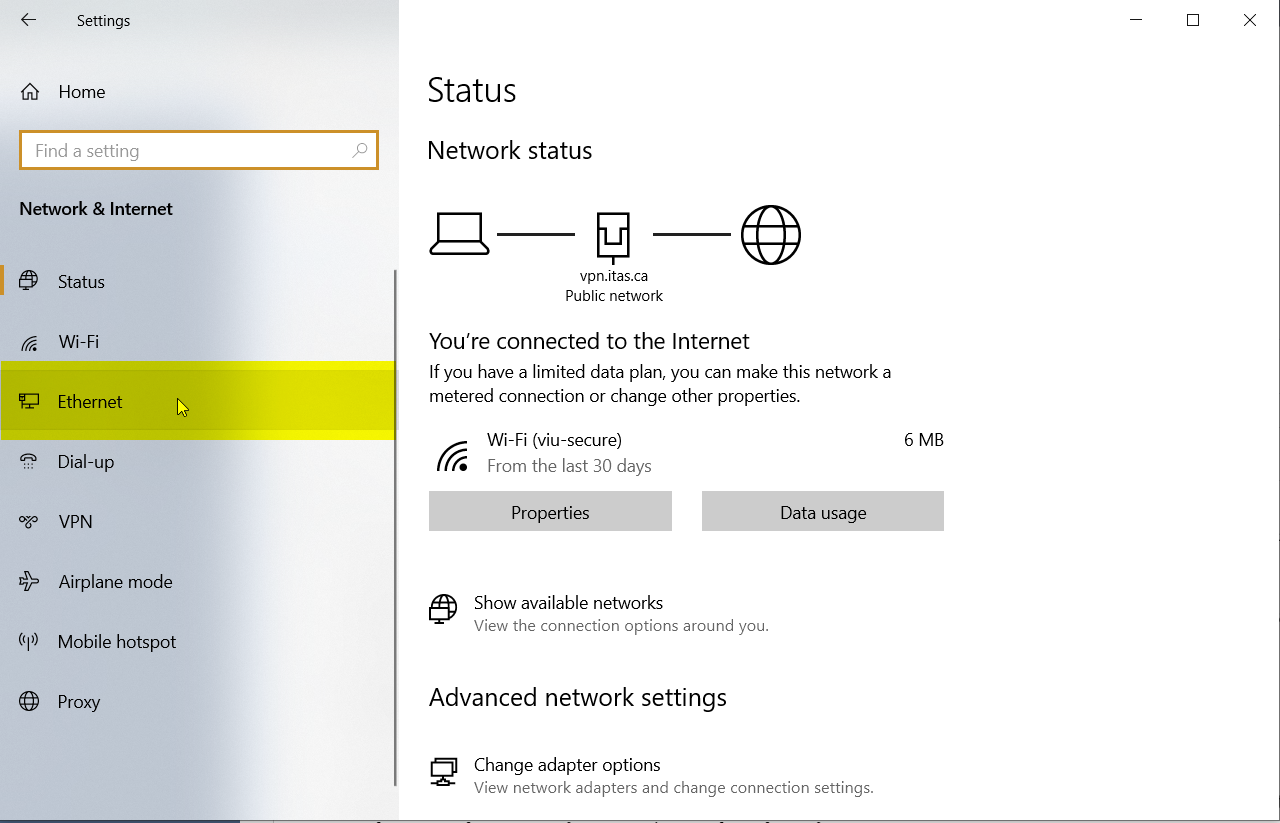
This will bring up the "Network Connections" Control Panel Applet. Locate your VPN connection adapter (in my example, "ITAS VPN"). Right-click on the adapter and click on "Properties".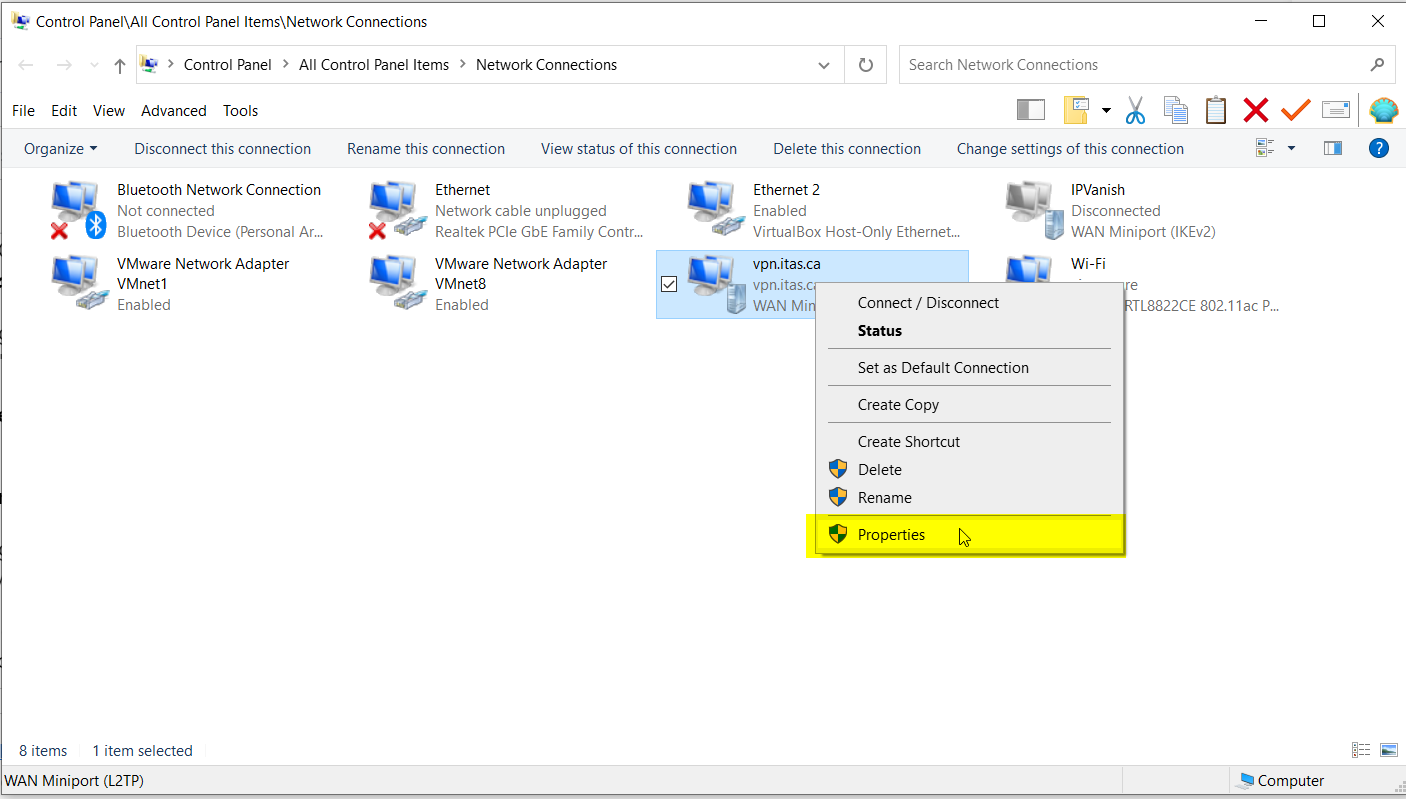
In the "Properties" dialogue, click on the "Networking" tab, then on "Internet Protocol Version 4 (TCP/IPv4)" item, and finally on the "Properties" button.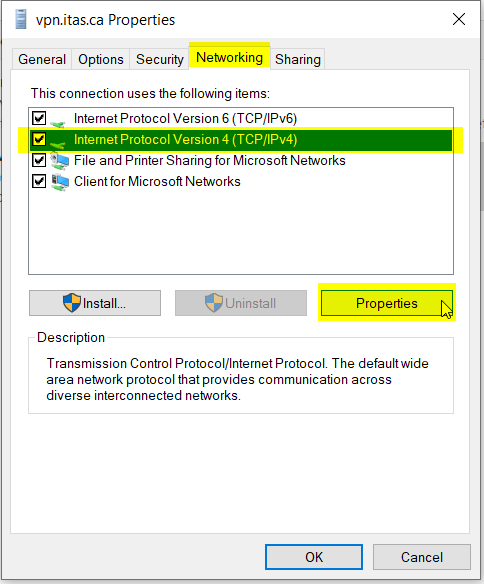
In the "Internet Protocol Version 4 (TCP/IPv4) Properties" dialogue, click on the "Advanced" button.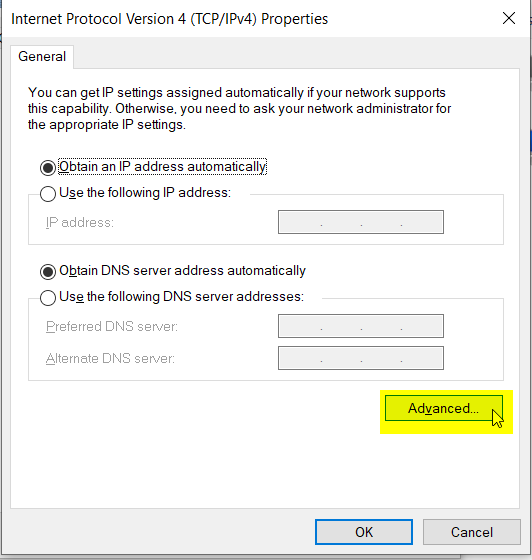
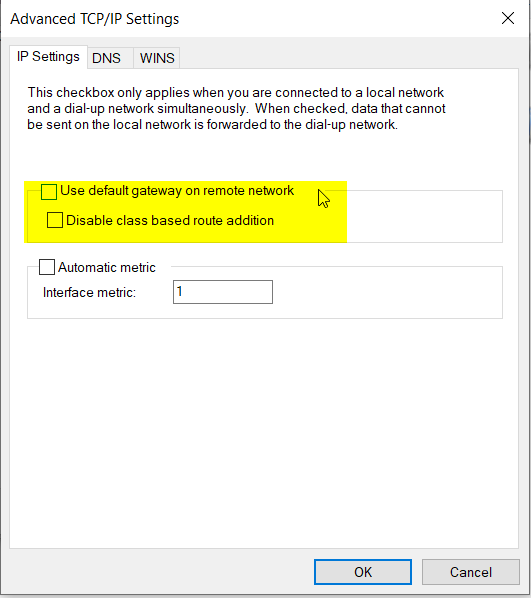
This will bring up the "Advanced TCP/IP Settings" dialogue. On the "IP Settings" tab, UNCHECK the "Automatic metric" checkbox and enter a value of "1" in the "Interface metric" input field.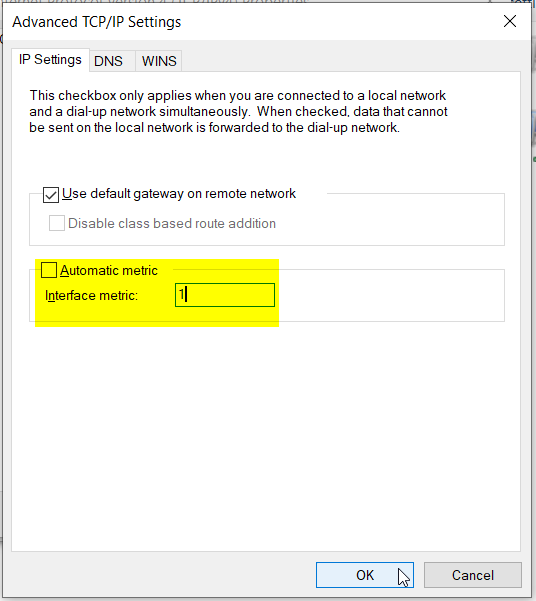
Finish off by clicking "OK" 3 times. This will bring up a warning dialogue warning that the settings will not take effect until the next time the connection is started.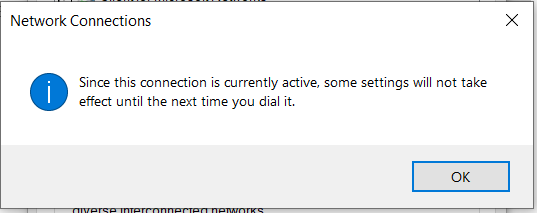
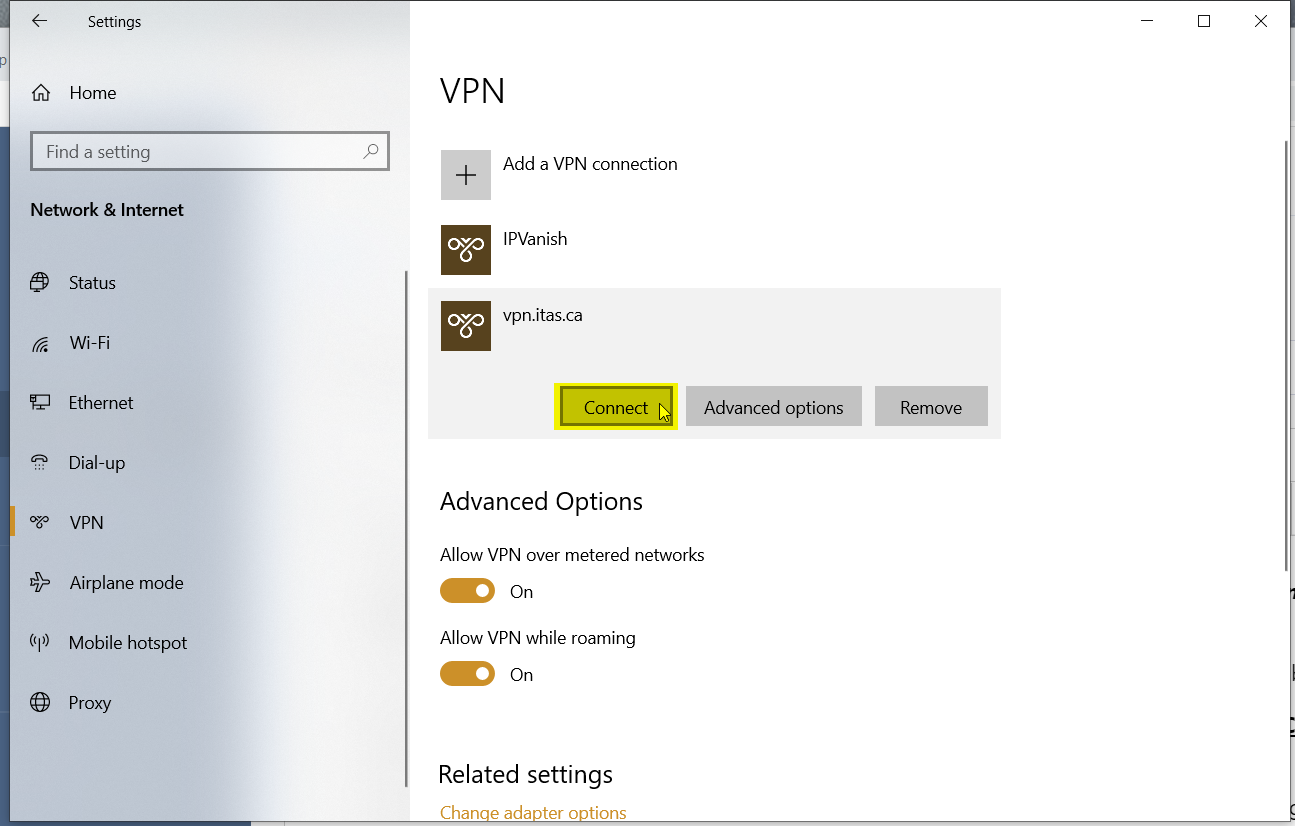
In the "Network & Internet" settings, disconnect from the VPN by clicking on "Disconnect".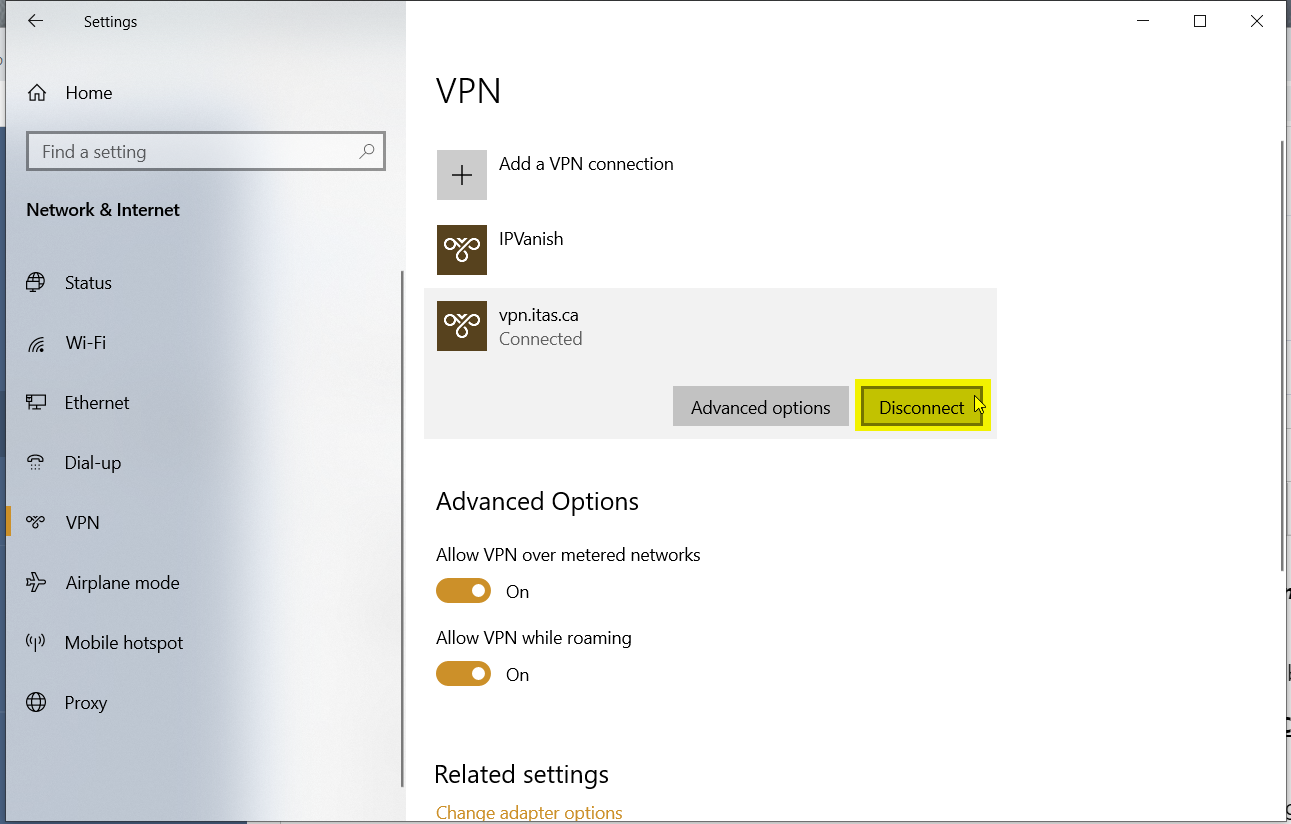
Reconnect by clicking on "Connect".
Test again in MobaXTerm (Exit MobaXTerm and restart the program to clear caches) by issuing a "nslookup dev.itas.ca" command. You should now receive the internal IP address of the dev server, namely "10.104.142.104".
You can also check other ITAS IP addresses, such as portal.itas.ca. They should all come up with 10.104.142.0/23 network IP addresses.
If you are still getting the DNS address from an external server vice the ITAS internal DNS (10.104.192.93), you can turn off another Windows "smart" feature. Edit your "Internet Protocol Version 4 (TCP/IPv4)" as above for the DNS metric, but this time, UNCHECK "Use default gateway on remote network".
This should ensure that all DNS requests will go through the ITAS internal DNS servers. If you are still having DNS problems, please submit a ticket so I can investigate and/or provide assistance.
Mac OS
To set up the VPN from Mac OS, open your System Preferences by clicking on the Apple Icon at the top left corner of your display and then select System Preferences.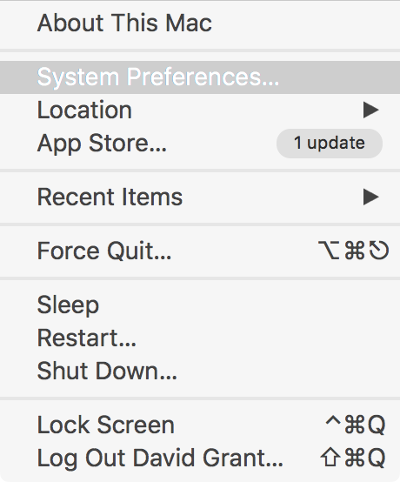
From your System Preferences applet, select Network.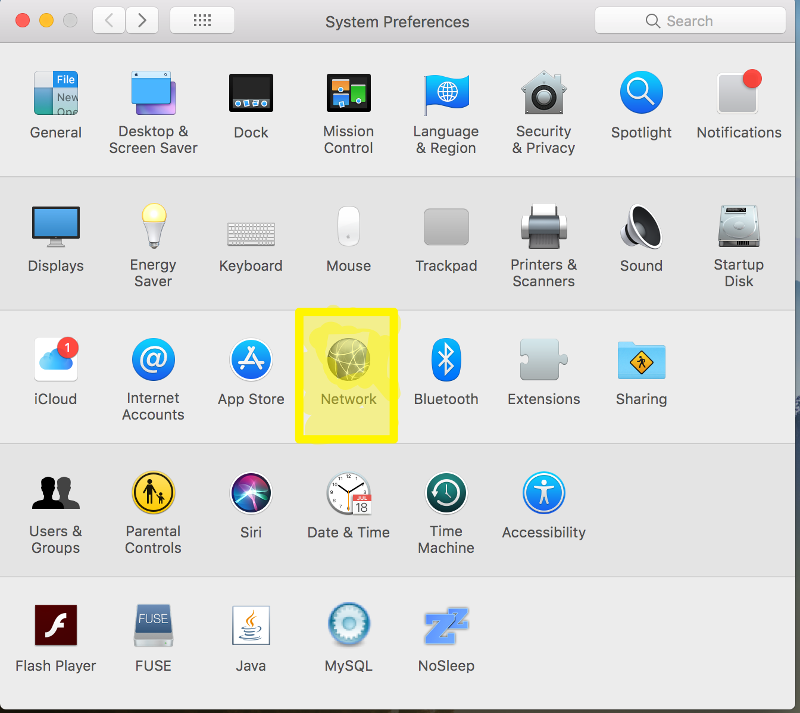
From the Network settings panel, click on the Add Connection (Plus sign (+)) button at the bottom of the connections list.
This will bring up a panel where you set the original settings for the VPN connection. Fill in the fields as below and then click on Create.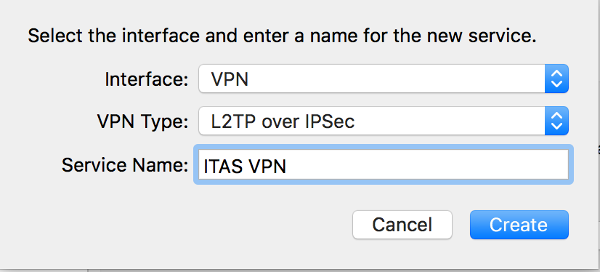
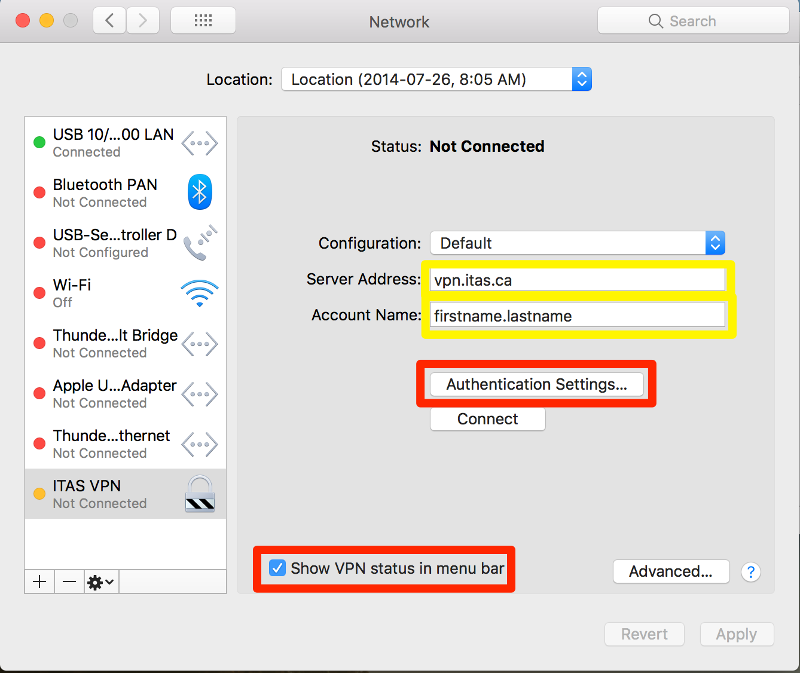
- Now, for the critical settings for the ITAS VPN connection, you must enter the Server Address to vpn.itas.ca and your Account Name to firstname.lastname. Once these two fields are filled in, click to enable Show VPN status in menu bar and then click on the Authentication Settings... button.
In the Authentication Settings panel, enter your internal ITAS password (the same as used in portal and dev) in the Password: field and then under Machine Authentication: - Shared Secret: enter "vpn@itas" (without the quotes) and then click on OK.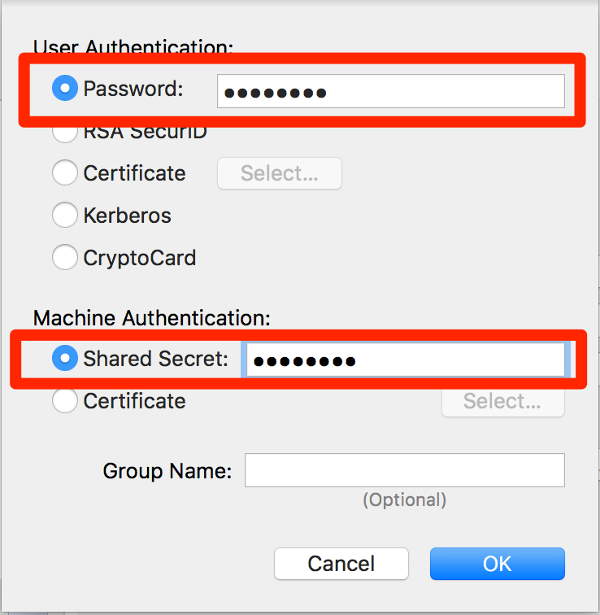
Once back on the Network panel, click on Advanced... 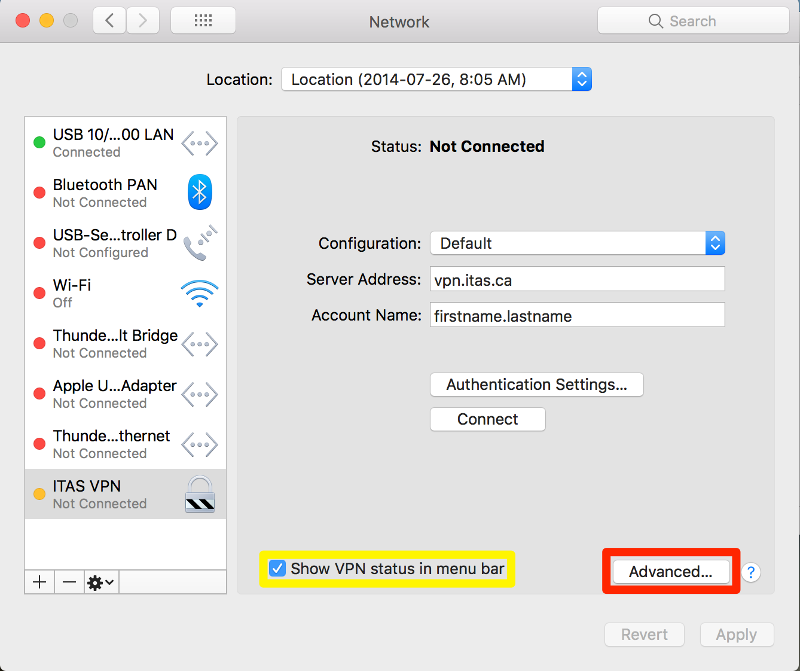
Once on the advanced settings panel, ensure that you click to enable Send all traffic over VPN connection and then click on OK.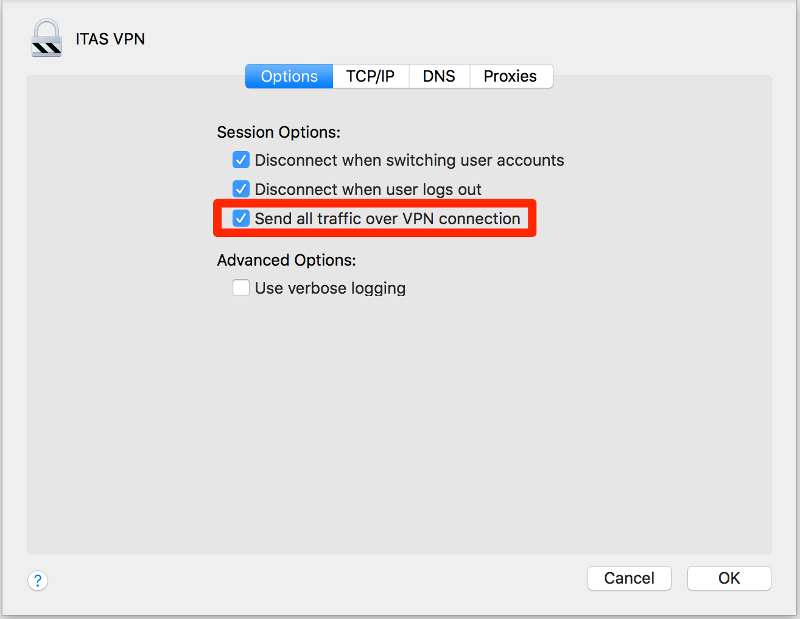
Once back on the Network panel, click on Connect. The VPN connection will establish itself, check authentication and then complete the connection. You should see in the Status: area the status of the connection and now have an IP Address of 10.104.192.xxx. You can now close the Network panel.
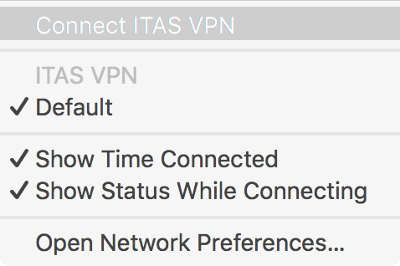
In your taskbar, you should now have a VPN status icon where you can easily Disconnect ITAS VPN and Connect ITAS VPN in the future by just right-clicking on the VPN status icon.
![]()
When connected, it will have an option to Disconnect ITAS VPN.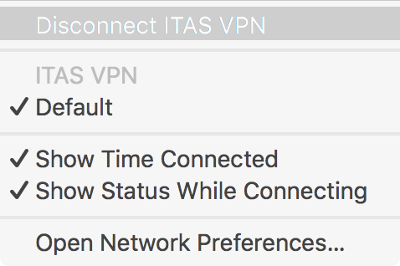
When not connected, it will have an option to Connect ITAS VPN.